Setting up Netting groups
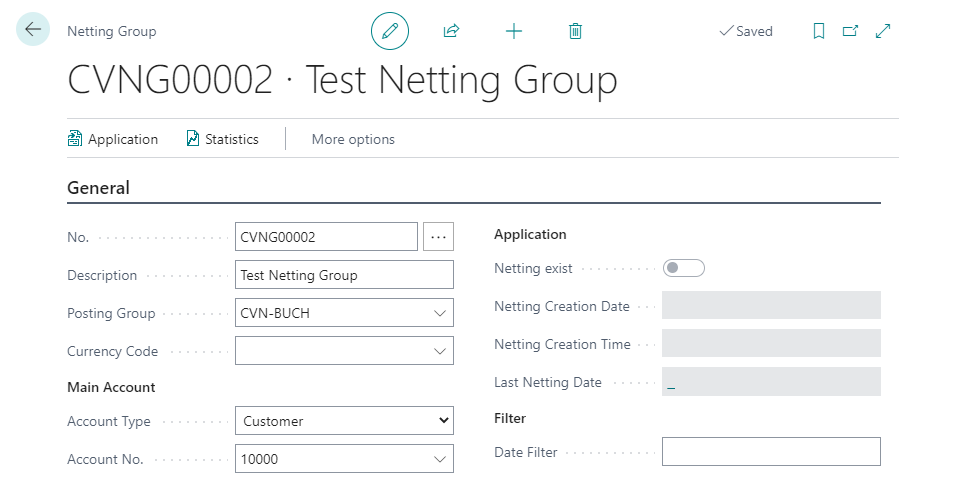
Netting Group Card
Open the list of Netting Groups and create a new Netting group with +New.

Then define the following information in the General tab:
| Field Name | Description |
|---|---|
| No. | Select the next free entry from the No. Series defined for Netting Groups. |
| Description | Give the Netting Group a descriptive name. |
| Posting Group | Assign the desired Posting Group for the automated postings. |
| Currency Code | If you want to use another currency besides the local currency for statistics and evaluations for this Netting Group, enter it here, otherwise leave the Currency Code field empty. |
| Main Account Account Type | Define here which Account Type the Main Account of the Netting Group belongs to. You have the choice between
|
| Main Account Account No. | Specify the number of the Main Account of the Netting group. |
Note
The Currency Code specified in the Main Account is taken over as a default value in the Currency Code field of the Netting Group. You can adjust this value manually if needed.
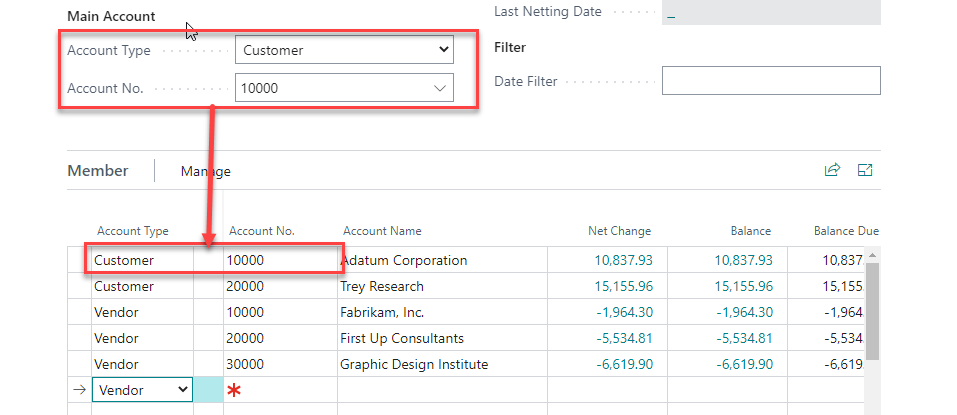
Netting Group Lines
As a next step, you define the further Netting Group Members. On the Members tab, select the Manage menu item and New Row, or click in an empty row to create a new row. Specify,
- whether the Account Type is a Customer or a Vendor and
- what Account No. the group member has.

Note
Business Central automatically creates the Main Account as a Group Member.
From the respective Customer / Vendor Card Currency Code as well as Balance and Balance at Date are taken over.

Note
Each customer or vendor can only be a member of exactly one Netting group. If you want to assign the member to another Netting group, you must first delete it in its "old" group.
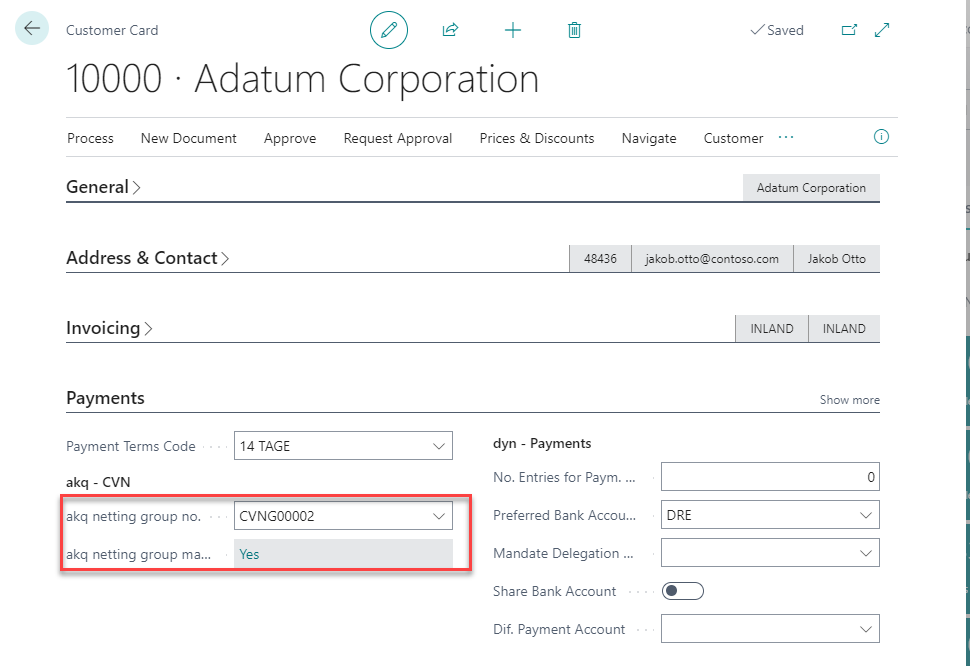
Customer Card
You can also see the membership of an Netting Group in the Customer / Vendor card in the Payments tab:

Note
You can also assign customers or vendors to existing Netting groups from the customer / vendor card. To do this, fill in the corresponding field.